Written by
Sunwoo Han
on
on
스프링 부트 활용 : 스프링 웹 MVC 1부
스프링 부트 활용
스프링 웹 MVC 소개
스프링 부트가 제공하는 스프링 웹 MVC와 연동되는 기능에 대해서 알아보자. 스프링 부트는 기본 설정에 의해서, 자동 설정 파일이 적용되었기 때문에 기본적으로 웹 MVC를 바로 사용할 수 있다.
간단한 테스트를 하나 만들어보자. UserControllerTest.java를 만든다.
package me.gracenam.demospringmvc.user;

import org.junit.Test;
import org.junit.runner.RunWith;
import org.springframework.beans.factory.annotation.Autowired;
import org.springframework.boot.test.autoconfigure.web.servlet.WebMvcTest;
import org.springframework.test.context.junit4.SpringRunner;
import org.springframework.test.web.servlet.MockMvc;

import static org.springframework.test.web.servlet.request.MockMvcRequestBuilders.get;
import static org.springframework.test.web.servlet.result.MockMvcResultMatchers.content;
import static org.springframework.test.web.servlet.result.MockMvcResultMatchers.status;

@RunWith(SpringRunner.class)
@WebMvcTest(UserController.class)
public class UserControllerTest {

    @Autowired
    MockMvc mockMvc;

    @Test
    public void hello() throws Exception {
        mockMvc.perform(get("/hello"))
                .andExpect(status().isOk())
                .andExpect(content().string("hello"));
    }

}
이걸 이대로 실행하면 에러가 발생하는데 아직 handler를 만들지 않았기 때문이다. 이제 handler도 만들어보자.
package me.gracenam.demospringmvc.user;

import org.springframework.web.bind.annotation.GetMapping;
import org.springframework.web.bind.annotation.RestController;

@RestController
public class UserController {

    @GetMapping("/hello")
    public String hello() {
        return "hello";
    }

}
이제 테스트를 다시 실행하면 테스트가 성공하는 것을 확인할 수 있다.
이렇게 스프링 웹 MVC 기능을 별도의 설정파일을 작성하지 않아도 바로 시작할 수 있다. 이게 바로 스프링 부트가 제공해주는 기본 설정 덕분이다.
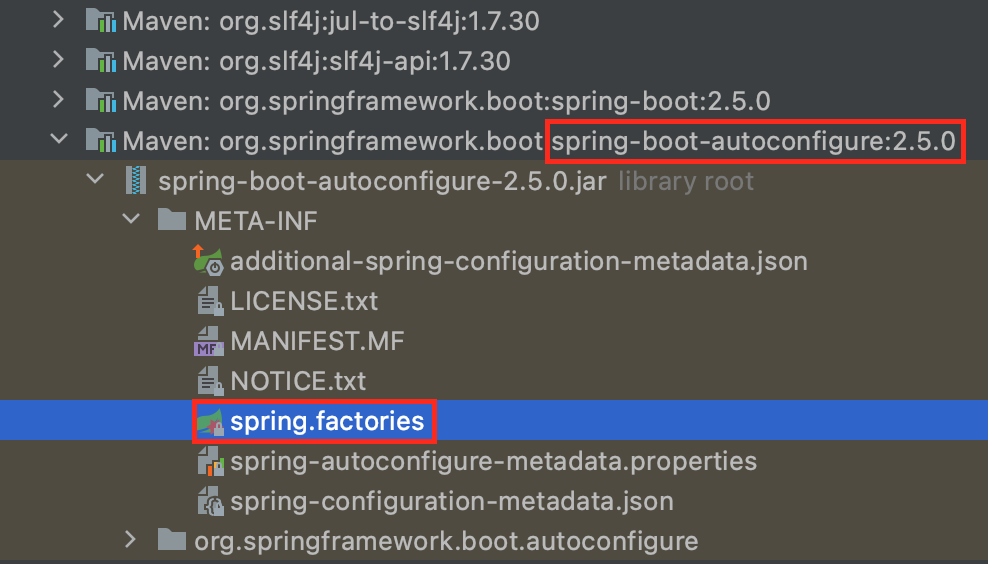
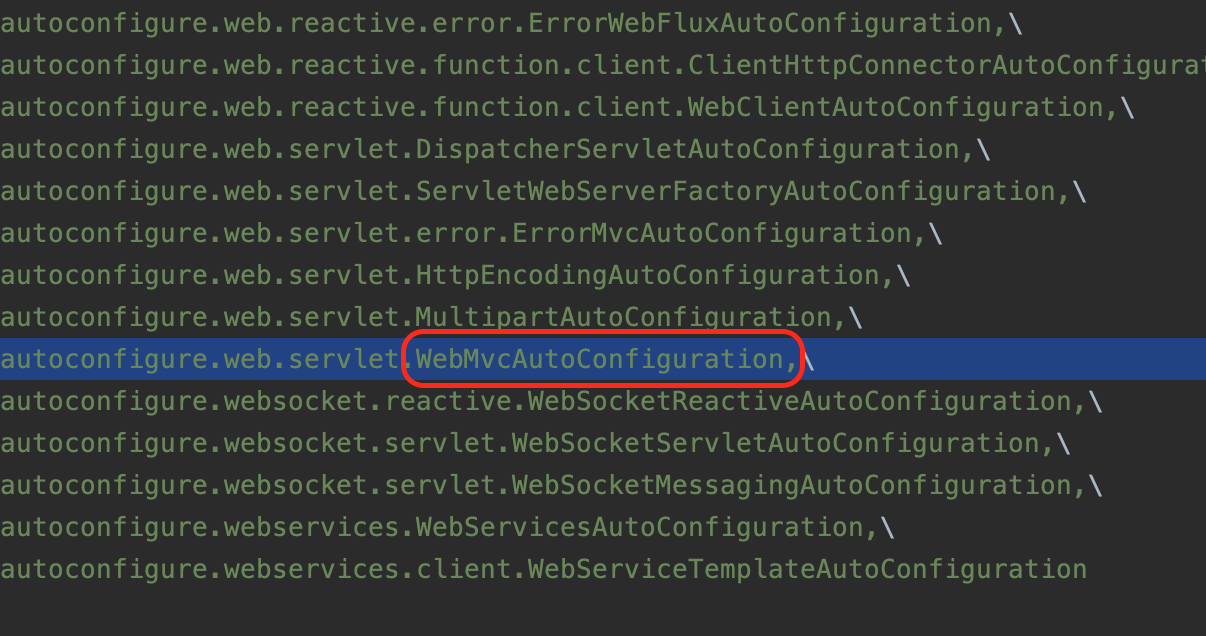
이 기본 설정은 spring-boot-autoconfigure라는 모듈에 있는 spring.factories안에 들어있다. 그 안을 살펴보면 WebMvcAutoConfiguration이라는 클래스를 볼 수 있다.


Reference
Comments
SPRING BOOT 의 다른 글
-
스프링 부트 활용 : 스프링 데이터 4부 17 Sep 2021
-
스프링 부트 활용 : 스프링 데이터 3부 16 Sep 2021
-
스프링 부트 활용 : 스프링 데이터 2부 15 Sep 2021
-
스프링 부트 활용 : 스프링 데이터 1부 14 Sep 2021
-
스프링 부트 활용 : 스프링 웹 MVC 11부 13 Sep 2021
-
스프링 부트 활용 : 스프링 웹 MVC 10부 10 Sep 2021
-
스프링 부트 활용 : 스프링 웹 MVC 9부 09 Sep 2021
-
스프링 부트 활용 : 스프링 웹 MVC 8부 08 Sep 2021
-
스프링 부트 활용 : 스프링 웹 MVC 7부 03 Sep 2021
-
스프링 부트 활용 : 스프링 웹 MVC 6부 05 Aug 2021
-
스프링 부트 활용 : 스프링 웹 MVC 5부 27 Jun 2021
-
스프링 부트 활용 : 스프링 웹 MVC 4부 13 Jun 2021
-
스프링 부트 활용 : 스프링 웹 MVC 3부 06 Jun 2021
-
스프링 부트 활용 : 스프링 웹 MVC 2부 05 Jun 2021
-
스프링 부트 활용 : 스프링 웹 MVC 1부 30 May 2021
-
스프링 부트 활용 : Spring-Boot-Devtools 30 May 2021
-
스프링 부트 활용 : 테스트 26 May 2021
-
스프링 부트 활용 : 로깅 2부 25 May 2021
-
스프링 부트 활용 : 로깅 1부 23 May 2021
-
스프링 부트 활용 : 프로파일 23 May 2021
-
스프링 부트 활용 : 외부 설정 2부 21 May 2021
-
스프링 부트 활용 : 외부 설정 1부 15 May 2021
-
스프링 부트 활용 : SpringApplication 11 May 2021
-
스프링 부트 원리 : 정리 06 May 2021
-
스프링 부트 원리 : 독립적으로 실행 가능한 JAR 06 May 2021
-
스프링 부트 원리 : 내장 웹 서버 04 May 2021
-
스프링 부트 원리 : 자동 설정 02 May 2021
-
스프링 부트 원리 : 의존성 01 May 2021
-
스프링 부트 시작하기 01 May 2021
